We pay negligible attention to the screen orientations despite using a computer from day one. It is predominantly because of the fact that most programs look best in landscape mode and use the complete area of a display.
But what if you want to rotate the screen in Windows 11?
Microsoft Windows supports screen rotation using which you can change the screen orientation as per your use case.
Remember the first encounter when your screen turned upside down abruptly? It certainly throws you off balance for a bit after which you desperately try to change to default display orientation settings.
But don’t worry because there are multiple methods to rotate the screen on Windows 11 and 10.
We will list four working methods to switch to the screen orientation of your choice (landscape, portrait, and flipped mode). Without further ado, let’s dive into the post.
How To Rotate The Screen In Windows 11
You can rotate the screen in Windows 11 using the settings app, NVIDIA control panel, Intel Command Center app, or use a third-party app. The older system shortcuts to change screen orientation don’t work in Windows 11, so you cannot use them anymore.
1. Rotate Screen Using the Settings App
Here’s how to rotate Windows 11 screen using the settings app.
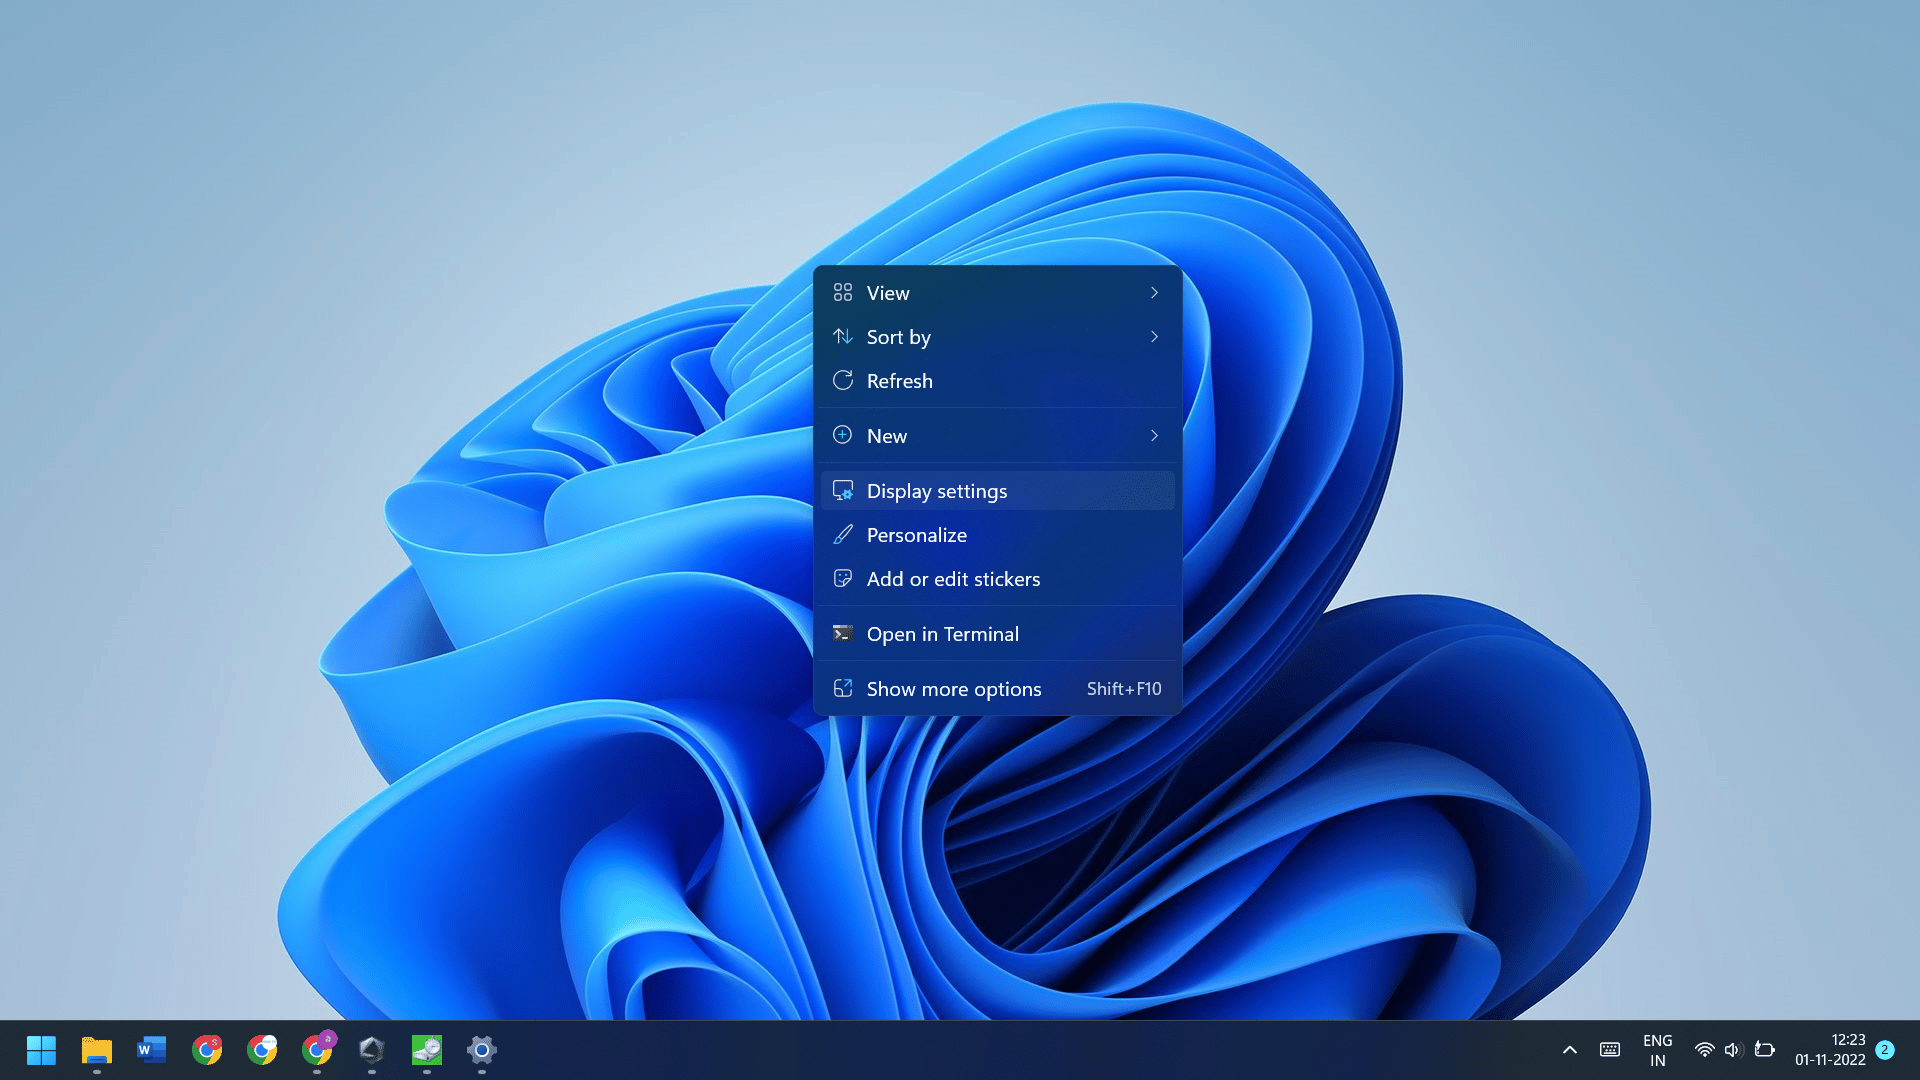
- Go to the desktop on your Windows 11 system. Right-click on the desktop and select more options. Now, select the Display settings option from the context menu.
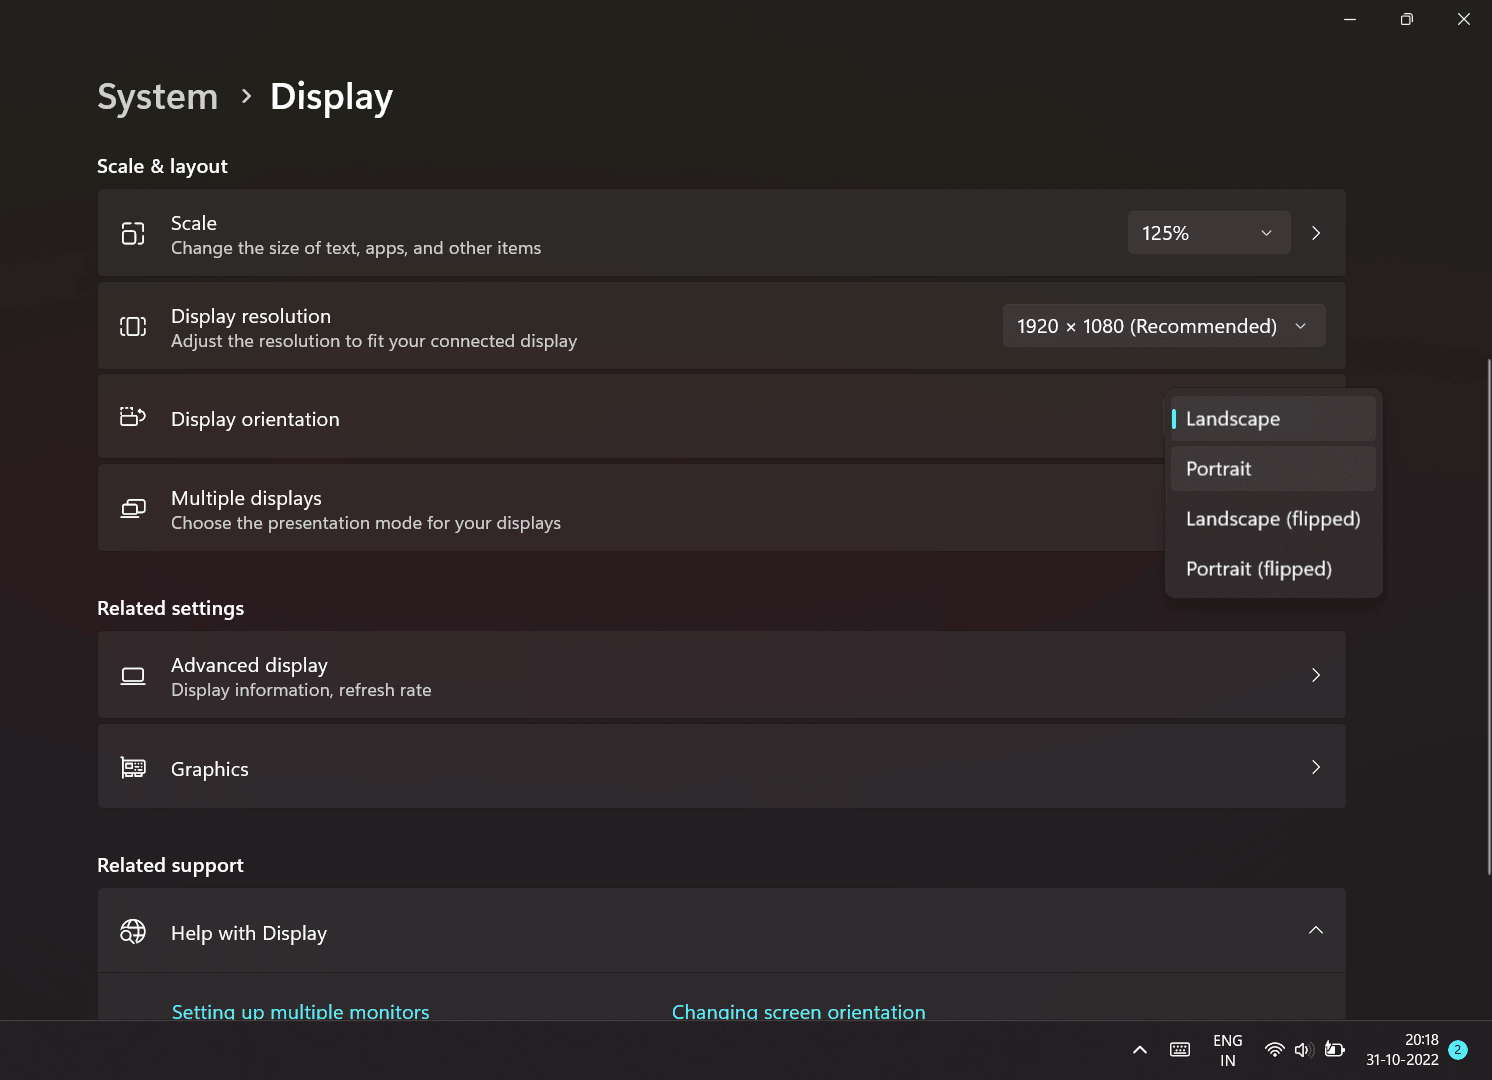
- The settings app will launch. Scroll down and find the Display orientation option. It will be landscape by default.
- Click on the drop-down arrow and select Portrait mode if you want to change the orientation to portrait for a vertical display.
- Likewise, you can also select the flipped options which flip the Windows 11 display to 180 degrees.
- Click on the Keep Changes button to apply the new screen orientation settings. Close the settings app.
2. Change Screen Orientation Using the Intel Command Center
If you have an Intel processor inside your Windows 11 laptop or PC, you can use the Intel Command Center app to rotate Windows 11 screen in a few clicks. However, if you use the old Intel Graphics Control Panel app, the interface may differ slightly.
- Press the Win key and type Intel Command Center in the search box. Click on the first relevant search result and launch the app.
- Navigate to the left-hand side vertical menu and click on the Display tab.
- Scroll down and find the Rotate option. Click on the drop-down menu and pick a screen orientation option.
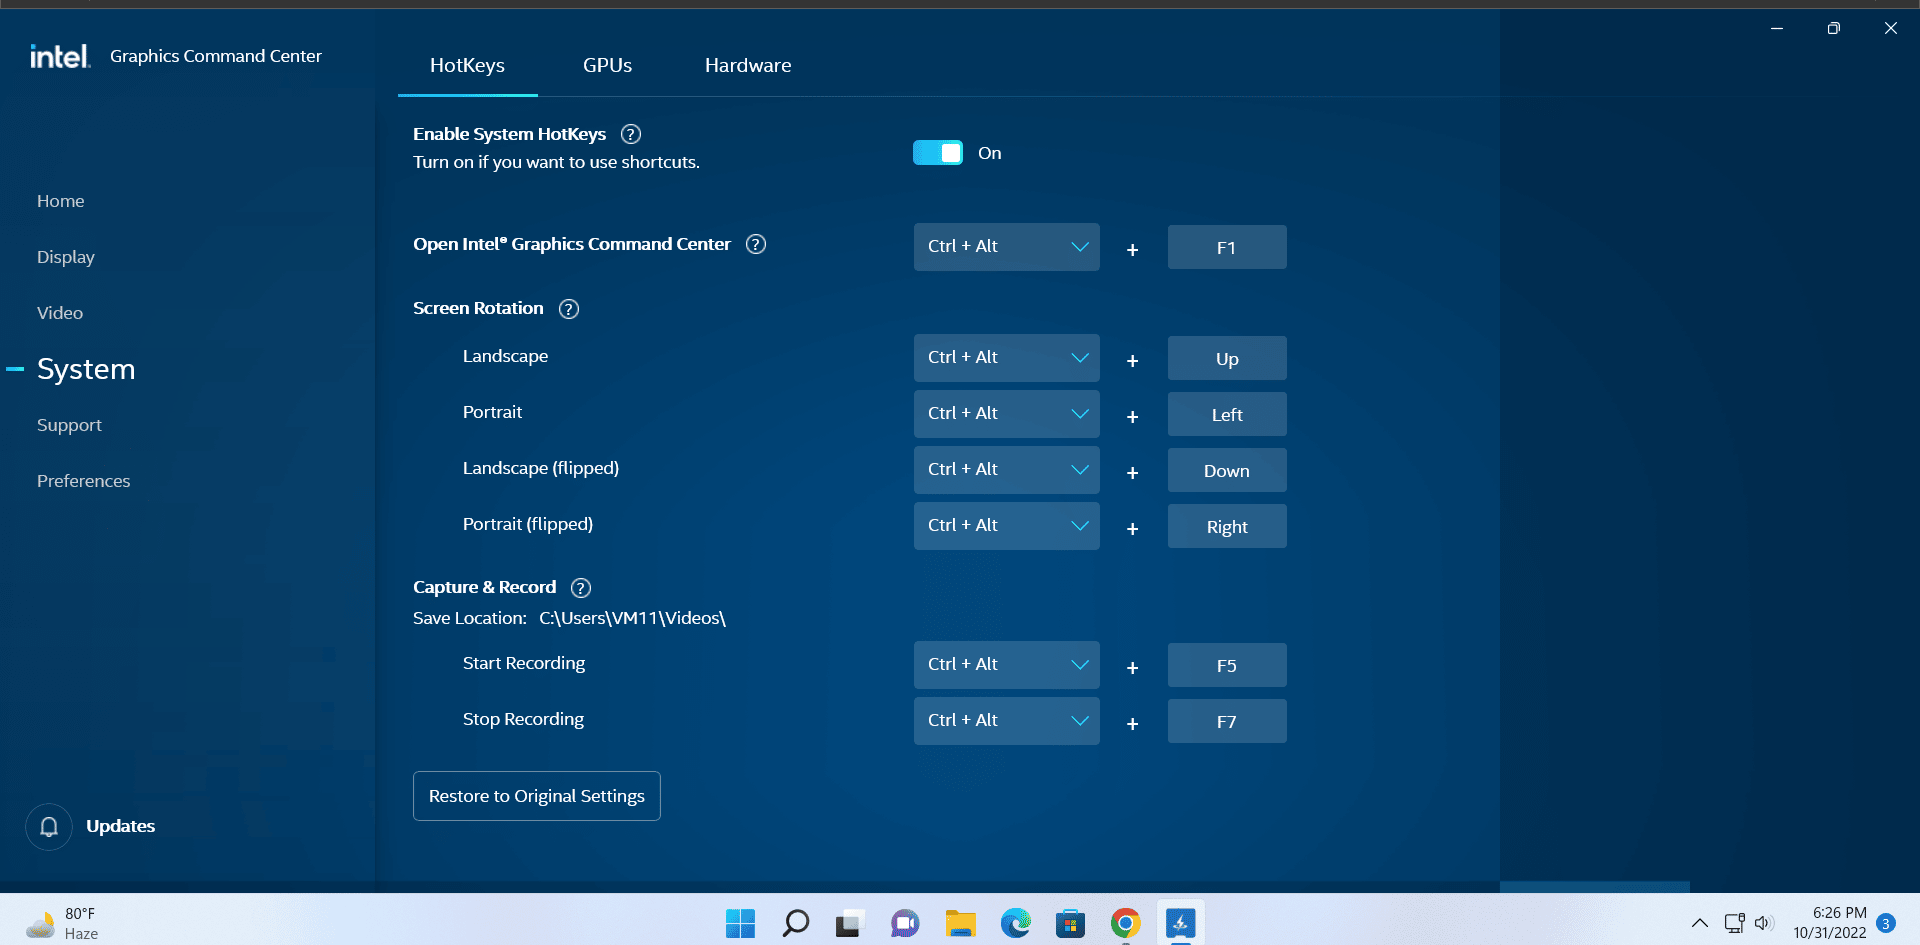
- You can also enable and set hotkeys to rotate the screen on Windows without opening the app. Click on the System option in the left-hand side menu.
- Click on the Enable System HotKeys toggle to activate shortcuts.
- If you want to change the shortcut keys, you can do it too. Just click on any screen orientation shortcut and assign whichever key you want.
Remember that picking an unused key combination is crucial. It should not coincide with an already existing system or app hotkey combination.
3. Rotate Screen Using the NVIDIA Control Panel
You can also access screen rotation settings using the NVIDIA Control Panel app. This method will only work if you have a discrete NVIDIA GPU on your PC. Moreover, update the NVIDIA GPU drivers to the latest version before executing this method.
- Open the desktop on Windows 11 and go to the system tray icons area on the taskbar.
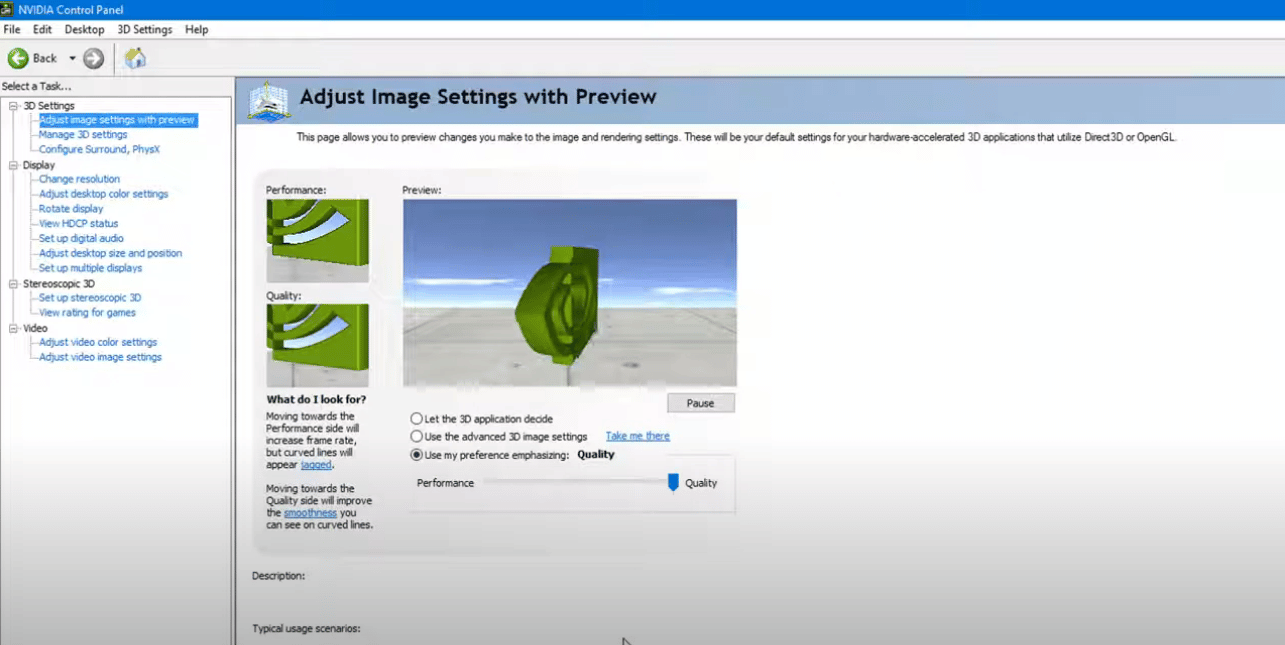
- Click on the arrow icon and then right-click on the NVIDIA icon. Select the NVIDIA Control Panel option from the list.
- Go to the left-hand side menu and expand the display options.
- Click on the Rotate display option. Then navigate to the Choose Orientation option in Rotate display settings.
- Click on the radio button on any screen orientation you want to use for your display.
- Accept the changes to apply the new screen orientation to Windows 11.
Note: If you have a multi-monitor setup, you can rotate the display of one or more monitors using the NVIDIA Control Panel.
4. Change Windows 11 Screen Orientation Using a third-party app
Yes, you need to use a third-party app to rotate the screen on Windows 11. Microsoft scrapped the old yet functional shortcut keys for rotating the screen. If you want to quickly change the screen orientation, these third-party apps enable shortcuts as well.
- Launch the Microsoft Store on Windows 11. Search for the Screen Rotate app.
- Click on the app search result developed by Adam Jędrzejewski. Then click the Get button to download and install the app on your system.
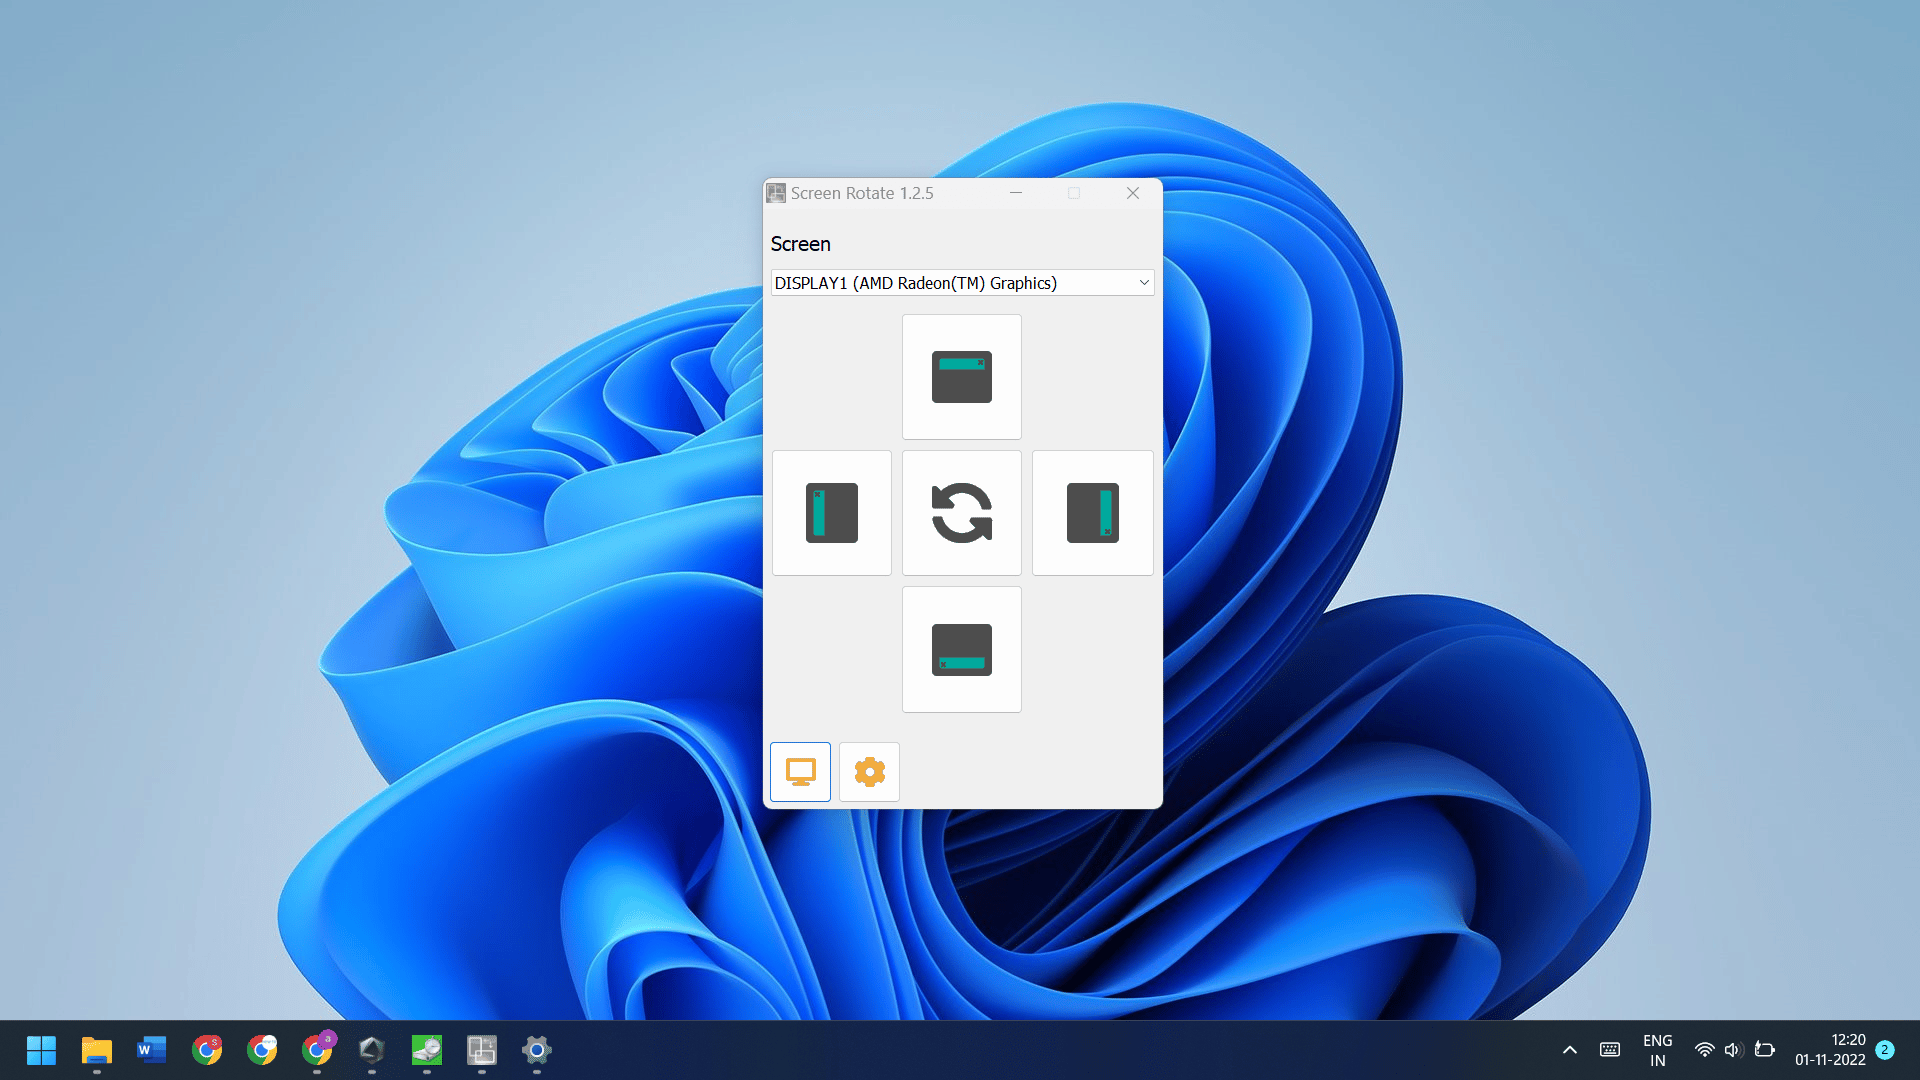
- Launch the Screen Rotate app. Go to the Screen section and pick the display whose screen you want to rotate.
- Then, click on any of the four icons to rotate the display to that side.
- If you want to test out all orientation types one by one, click on the rotate icon in the center.
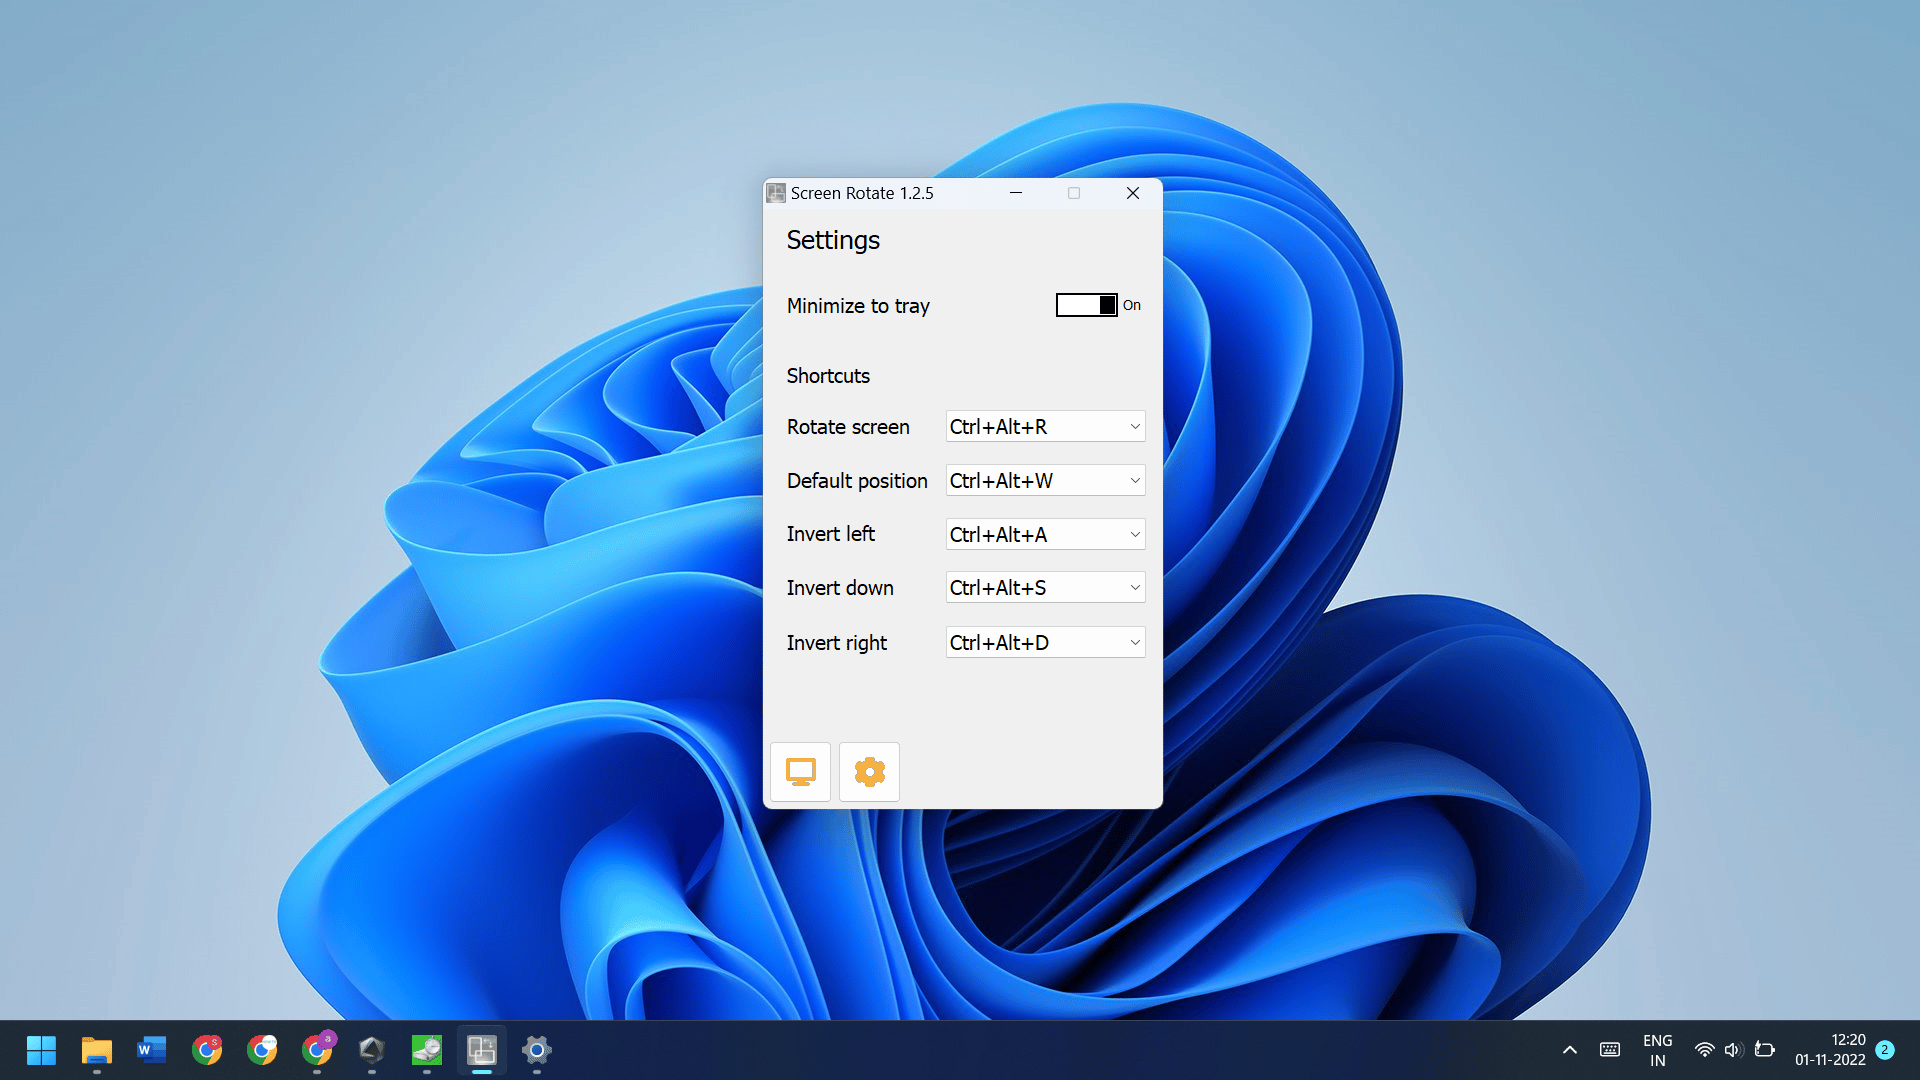
- To check or change the screen rotation shortcuts, click on the Settings icon at the bottom of the app window.
- Here, you can see the default key combination mapped for the rotation of the screen to supported directions.
- Click on the drop-down list to select a different key combination for a particular screen orientation. But, remember to not change it to any inbuilt Windows 11 shortcuts.
- Keep the Minimize to tray option enabled to keep the app running in the background and hide it in the system tray icon area.
Is rotating the screen on Windows 11 useful?
For most users, the landscape orientation is completely sufficient. But each screen orientation is useful in different use cases. Take the portrait screen orientation for example. It is best suited for multi-monitor setup users who have to use a vertical monitor in the setup. So, they need a feature to flip the screen orientation. Otherwise, the monitor will be unusable.
A lot of developers use a vertical monitor setup because lines of code don’t consume much screen space horizontally. By changing the screen orientation, they can use the screen space better and can display more lines of code at once. The same goes for anyone who uses a lot of charts and tracking graphs. All in all, it solely depends on the end-user.
Conclusion
Rotating the screen on Windows 11 is fairly easy. Now, you know four distinct methods to change the screen orientations in Windows. All the screen elements including the icons and taskbar adapt to the change. Sadly, shortcuts don’t work anymore useless you enable them using the Intel Command Center or use a third-party screen rotate app that offers the feature. Microsoft should take a cue from this and bring the old shortcuts to rotate the screen on Windows 11.
FAQ
Does Windows 11 have auto-rotate?
All devices which have a touch-screen and support tablet mode can auto-rotate the screen. However, if you use a laptop without a touch screen or 2-in-1 feature, or a PC, you have to manually rotate the screen on Windows 11.
How do I get my screen to view horizontally?
You can use the Windows 11 settings app to change the screen orientation. You can also use a third-party app or tweak the display orientation settings using the NVIDIA or Intel graphics app.
How do I manually rotate my screen?
Press Win + I to launch the settings app. Click on the Display option. Locate the screen orientation option under the Scale and Layout section. Change the orientation and apply the changes.
What is the shortcut key to rotate the screen in Windows?
You can use the Ctrl + Alt + Arrow key combination to rotate the screen in Windows. The change in orientation will depend on the arrow key you press with the Ctrl and Alt keys. For eg: You will flip the screen upside down if you use the Ctrl + Alt + Down Arrow key.
Why is rotate screen windows 11 shortcut not working?
There isn’t anything wrong with your computer. The rotate screen Windows 11 shortcut isn’t working because Microsoft disabled it. We don’t know the exact reason behind it. If you want to use the shortcuts again, install the Screen Rotate app from the Microsoft Store.


