Windows 7 is still used by over ten percent of computers around the world. You may need to download Windows 7 ISO for a variety of reasons. Whether it needs to be installed on an old PC or laptop to make it useable or installed on a computer with no DVD reader.
Moreover, there are several tools and applications that only work with Windows 7. This can be another reason to download Windows 7.
There can be dozens of reasons to download Windows 7, which was amongst the most stable OS from Microsoft for a long time.
Earlier users could download Windows 7 ISO directly from the official Microsoft page. After the OS got discontinued, the page was removed. Therefore, many are searching the Windows 7 download links to get the operating system for their computer.
We have links to download Windows 7 for free. After that, you can learn to create a bootable USB and then install the operating system through the descriptive tutorial.
Note: Microsoft no longer provides security updates and support to Windows 7.
Download Windows 7 ISO (Professional and Ultimate Editions)
Direct Download Link
Here are the direct download links for Windows 7, 32-bit, and 64-bit sourced directly from the Microsoft servers. They are ready to create bootables or BURN for installing Windows 7 on the computer.
You will need 4 GB of RAM along with 20 GB or more hard disk space with a modern processor for the 32-bit version of Windows 7. Double the requirements we discussed, and 64-bit will run without a hiccup.
Microsoft discontinued the OS, and hence the official section to download Windows 7 ISO is dead. Here we have sourced direct links to download the Windows 7 ISO.
Create Windows 7 Bootable USB/DVD
After downloading the Windows ISO, it is time to create Windows 7 bootable, which will install the operating system.
A single Windows 7 bootable media can install the OS on a single PC or multiple computers through network installation.
Prerequisites
- Windows 7 ISO
- 8 GB USB flash drive
- Rufus, a bootable creation app
- 20 GB space on the local storage on a partition for installation
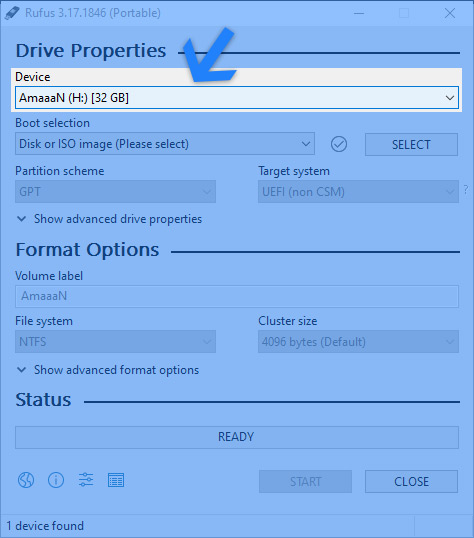
1. Launch Rufus and select the right flash drive in the device section to create a bootable Windows 7 USB
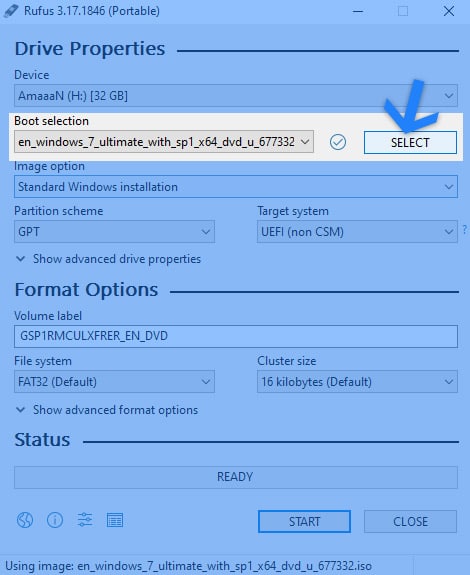
2. Move to the boot section, and choose the Windows 7 ISO file through the select button.
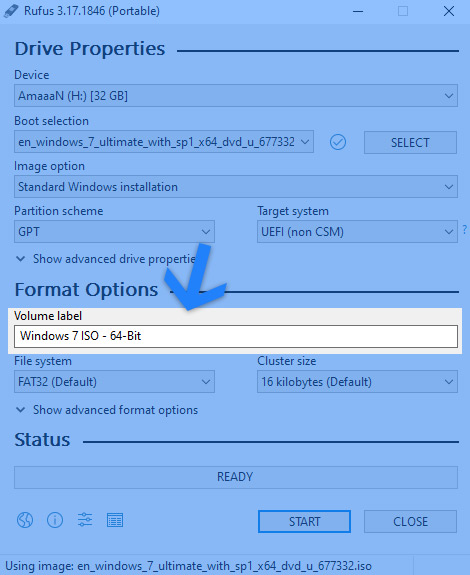
3. Head straight to the Format Options section and give your Windows bootable drive a name. It can be anything of the user’s choice. We kept it “Windows 7 ISO – 64-Bit” to make it straightforward to remember.
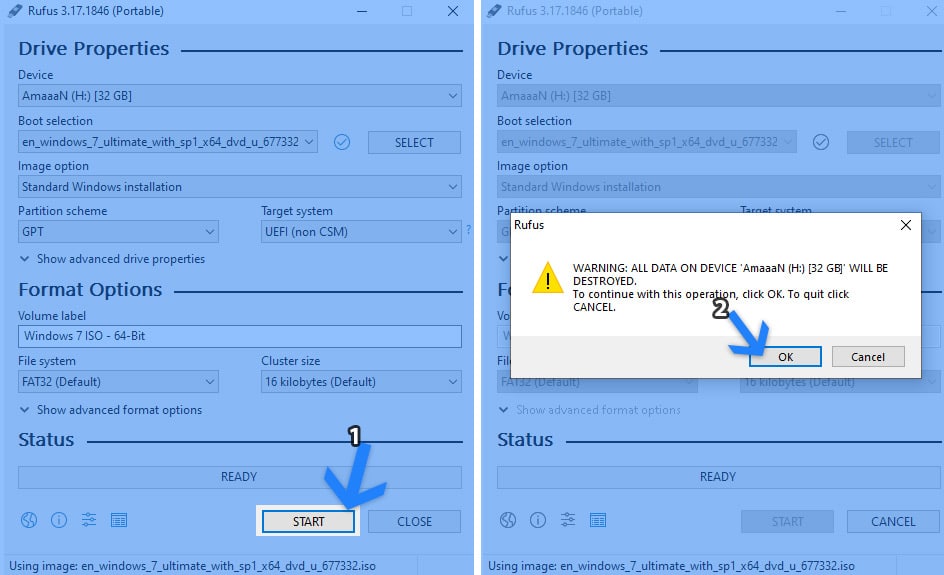
4. Once everything above is done, click on the Start button, and a prompt will appear, asking for confirmation.
Make sure to back up the flash drive’s data before clicking on the OK button.
The bootable creation process will take up to a couple of minutes, depending upon the write speed of the flash drive and local storage.
How to Install 7 Windows ISO
We downloaded a Windows 7 ISO and made a bootable flash drive using that. It’s time to install Windows 7 on a PC. Plug in the bootable flash or insert a Windows 7 installation disc if you have it lying around.
Before moving forward, we must make the computer boot from the bootable flash drive or DVD. It can be done through the boot menu key or the BIOS, normally in the boot section. The boot menu shortcut is different for various laptops and mother manufacturers. Here are the shortcuts of the major components manufacturers
Laptops
| Brand | Boot Menu Key |
| ASUS | F8 |
| Acer | F12 |
| Dell | F12 |
| HP | F9 |
| Lenovo | F8, F10, F12 |
Desktops
| Motherboard Brand | Boot Menu Key |
| ASUS | F8 |
| Gigabyte | F12 |
| MSI | F11 |
| Intel | F10 |
| ASRock | F8, F11 |
| Biostar | F9 |
1. Plug in the bootable USB and then restart the computer. You can also insert a DVD and follow the process.
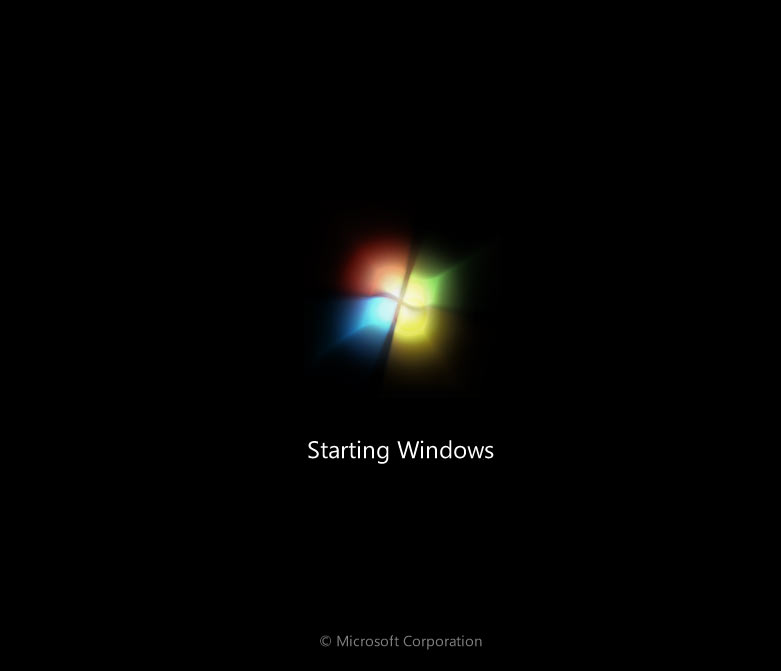
2. Use the boot menu key to boot; the Windows will load as the logo appears on the screen.
3. The Windows installation menu will come up after loading the files. Select the language, time, currency format, and keyboard or input method. English has many versions, so select one for your region.
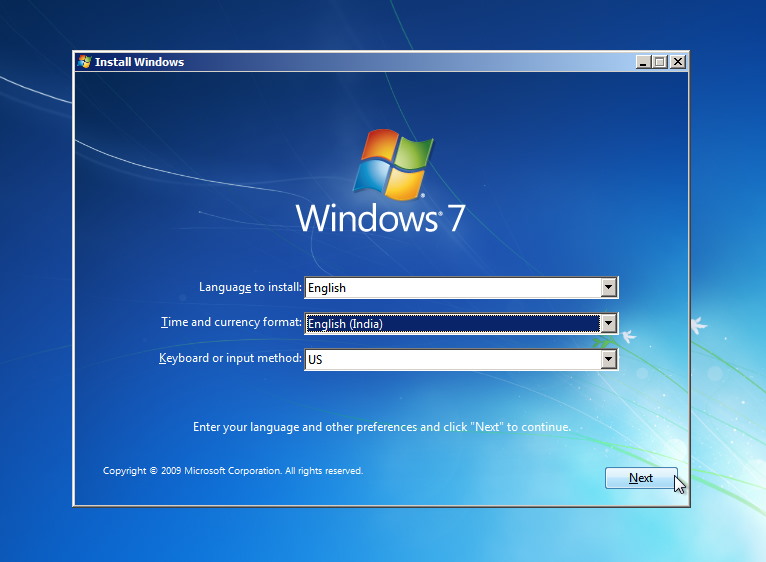
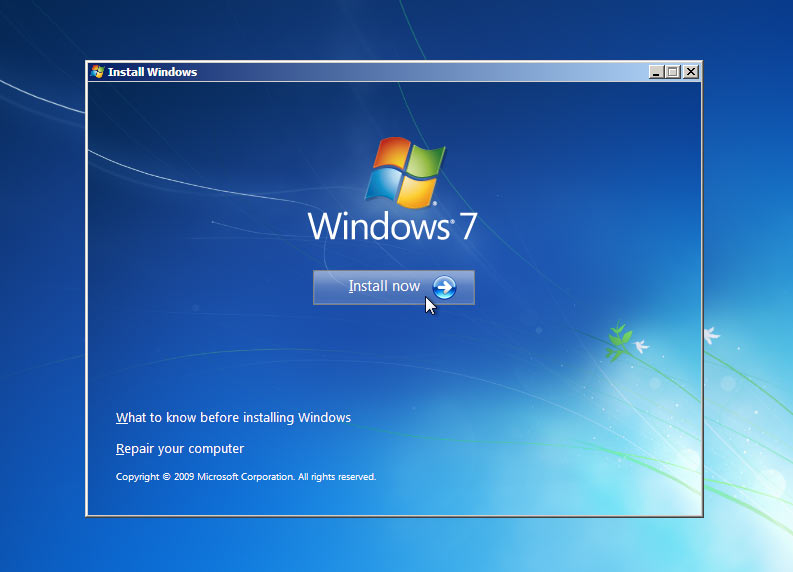
Once done, click on Next and access the main install now menu, where the real installation process begins.
4. Click Install Now and proceed to the main installation of Windows 7
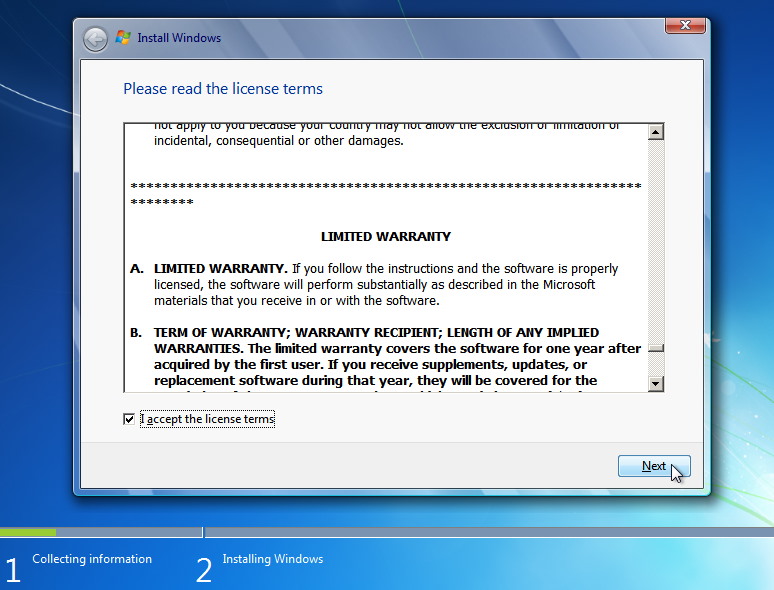
5. Accept the terms and conditions of Windows SP1. Consider giving a quick read before ticking the box I accept the license terms. Click Next to proceed forward to the next step
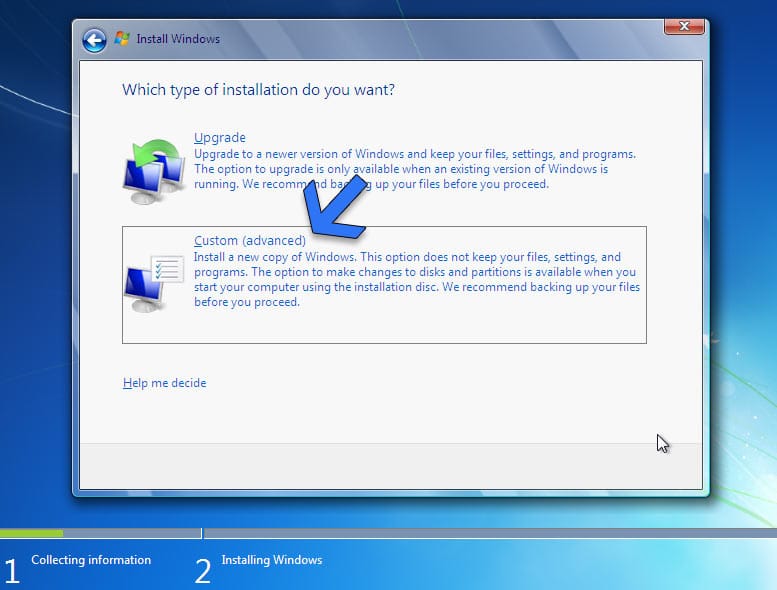
6. The next screen has two types of installations – Upgrade and Custom (Advanced). Select Custom and proceed to the formatting menu.
The upgrade option is for users who want to keep their existing Windows settings, files, and programs. They will be intact and available on the newly installed Windows 7.
On the contrary, Custom (advanced) is for users who want to start fresh with a clean slate and more control over the installation. Users get to format or create partitions, and other changes can be made to the disk.
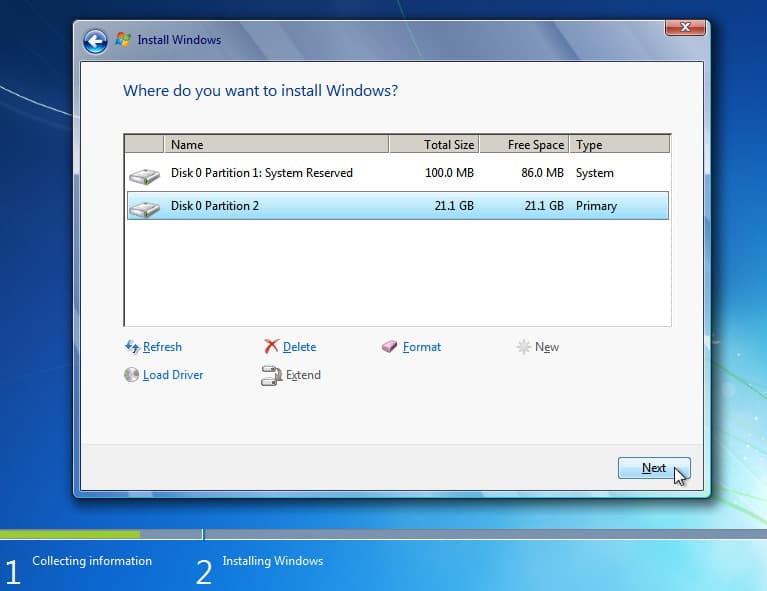
7. Select a partition from the options and click Next. Make sure the selection has the required space, or the partition manager will ask to format it to make way for the Windows 7 installation.
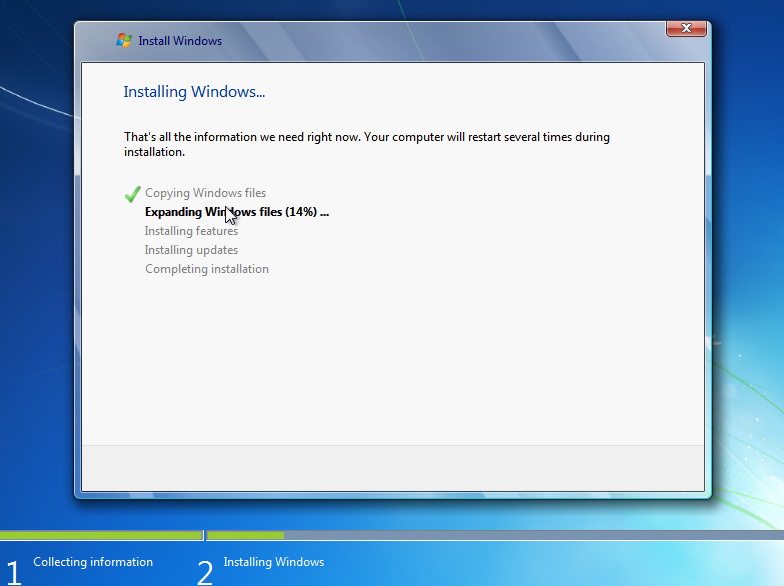
8. The Windows 7 installation will begin, and the time will primarily depend on the hard disk/SSD.
NVMe-based SSDs will be the fastest, followed by SATA-based SSDs, and platter-based hard disks are the slowest.
The computer will reboot, and the Start Windows will appear on the loading screen.
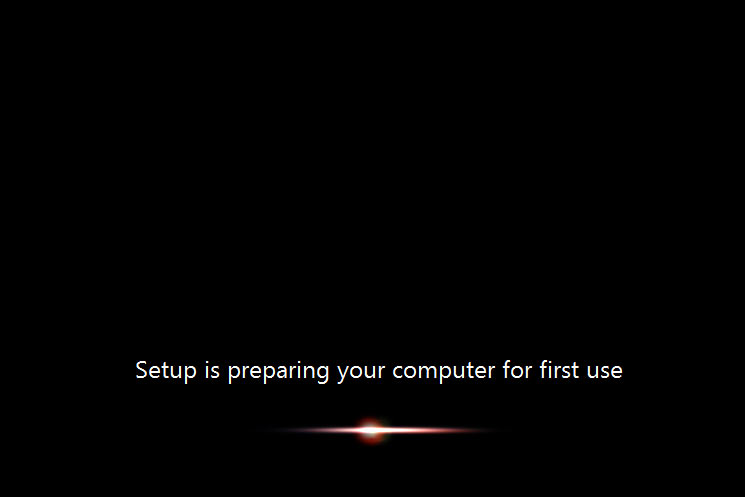
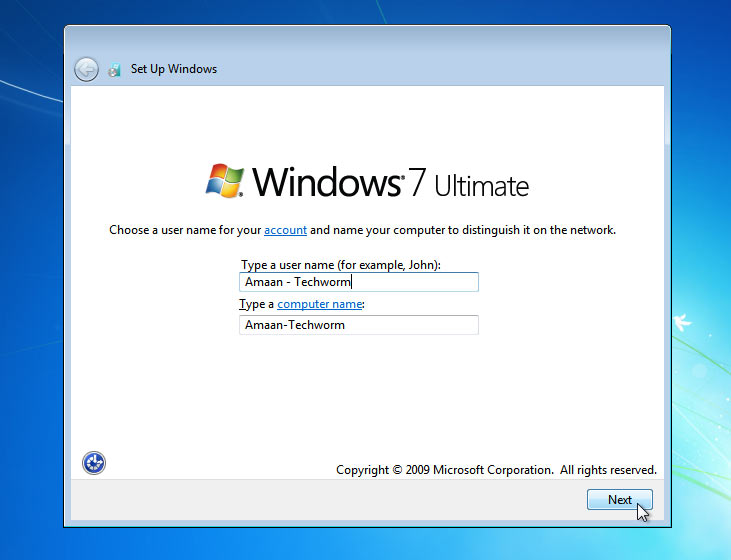
9. We will land in the Set up Windows wizard after the installation is complete. Fill in your name in the username dialogue box, and provide a name for the computer in the second box.
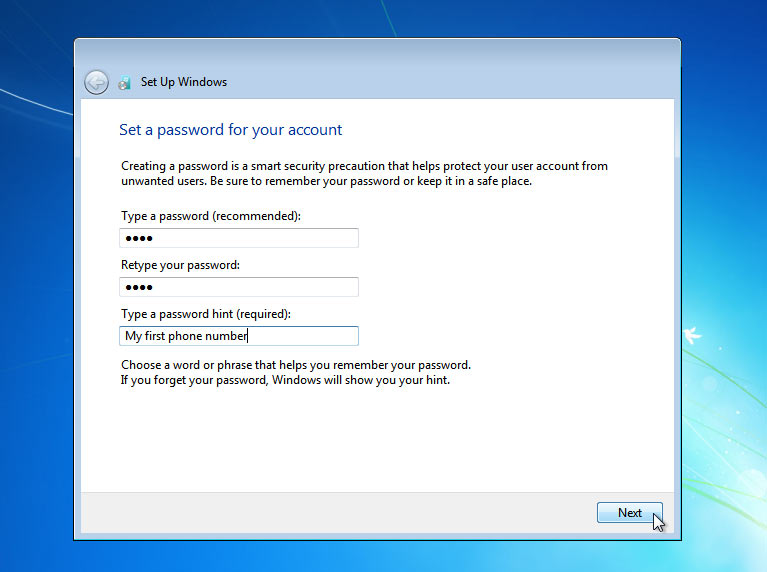
10. Next is to create an account for the computer. It will be asked on starting or logging into the computer. Make sure the password is easy to remember, and the hint can help recall the password.
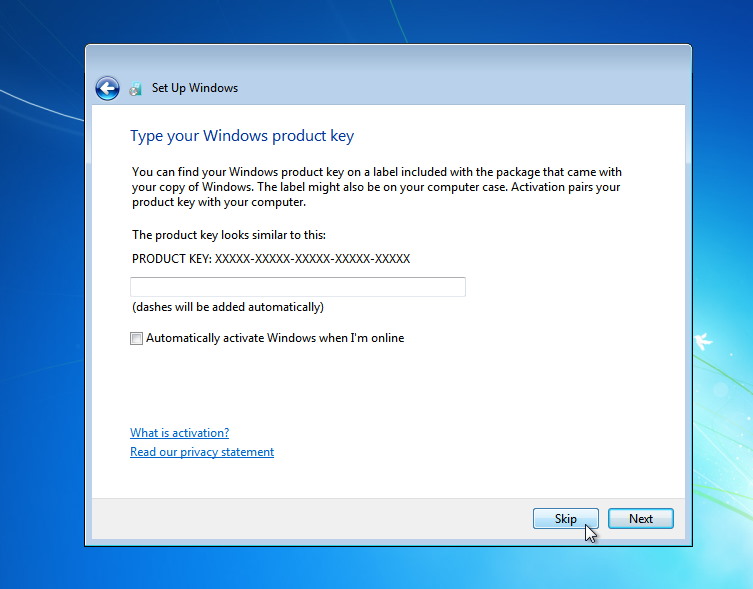
11. Enter the Windows 7 product key if it’s with you. Click on Skip to proceed and enter at a later time.
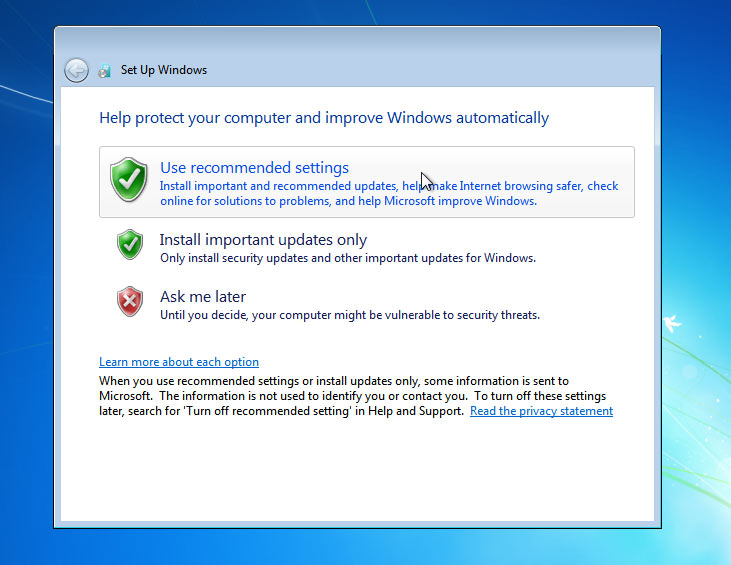
12. Select the Widows updates schedule, which helps in protecting the computer and improves the performance. Select Use recommended settings when undecided on which option to select.
The other options are for experienced users familiar with Windows updates and how they work.
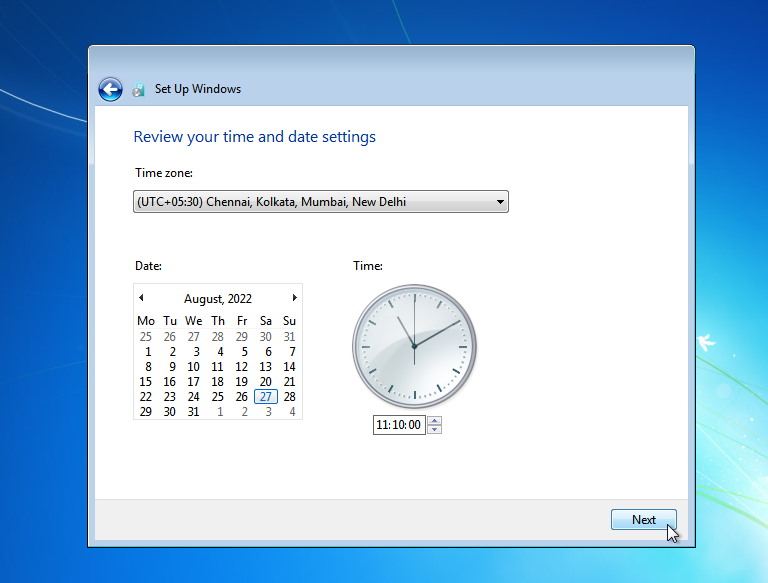
13. Next is the time, date, and timezone settings. Select your region’s time zone and check the date and time to confirm. It will be automatically selected if the computer is connected to the internet through an ethernet wire.
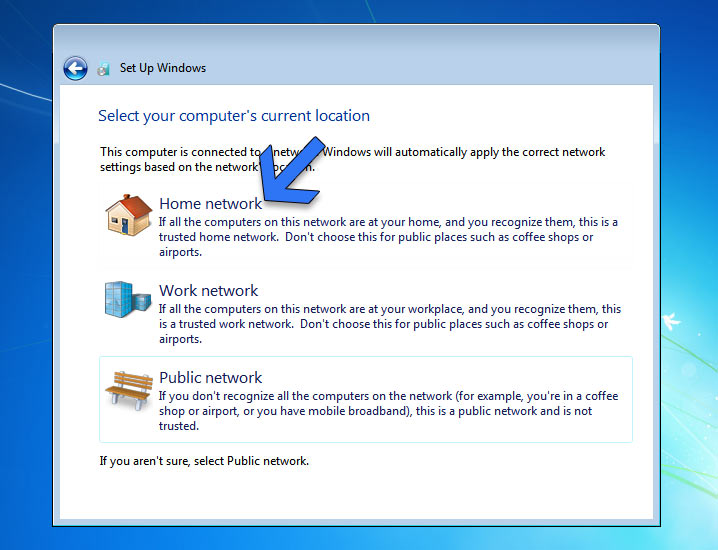
14. This menu will appear if the computer is connected to a network(preferably the internet). It will ask to confirm which type of network is connected in order to optimize the settings.
- Home Network – This is best for computers connected in a home as a single computer or a local network, and It can be used to connect all computers on a network.
- Work Network – Ideal for all the registered computers in a professional environment, generally an office or an educational institution.
- Public Network – If you are using the internet in a public space and don’t recognize all the computers connected to the grid.
Select either of the options according to what individually applies. The settings will take a minute or two be applied.
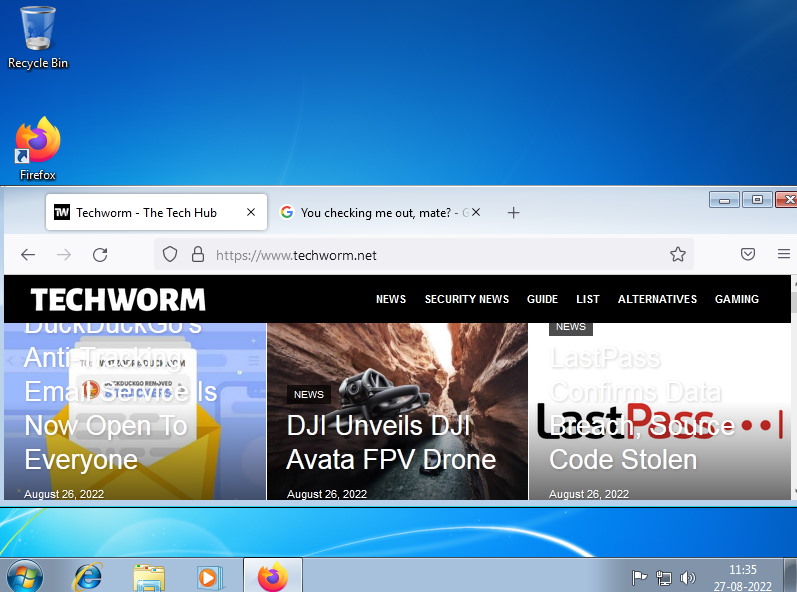
Windows 7 is finally installed, and you will land on the desktop. Install all the necessary applications like a browser, PDF reader, media player, office suite, etc.
FAQ – Frequently Asked Questions
Is it a genuine Windows 7 ISO File?
Will Windows 7 run on 4 GB of RAM?
Is it legal to download these Windows 7 ISOs?
Can I upgrade from 32-bit Windows 7 to 64-bit Windows 7?
Technically all the processors produced in the last decade are 64-bit, but there is no harm in confirming. Therefore, before moving forward with the upgrade, make sure to check if your processor supports the newer tech. Use GRC to determine your processor’s supported architecture.
Which one is the best app to create Windows 7 bootable?
Should I download Windows 7 from Torrent?
We recommend sticking with the official Windows 7 download links listed above.
Can we just copy Windows 7 ISO to the USB drive to make it bootable?
Will I receive Windows updates?
You will receive Windows updates only after entering the product key and registering Windows 7 on the Microsoft servers. All the registered Microsoft products receive regular updates, often to enhance the security of newfound vulnerabilities.
Windows 7’s official software support ended in January 2020, so Microsoft will not send security updates to post that.
Microsoft pushed a catalog for receiving regular updates till 2023 through these installers. Launch them after opening the links from Google Chrome or Mozilla Firefox.
Conclusion
You have learned how to download Windows 7 ISO through the direct links. We also have included a tutorial to create Windows 7 bootable.
Follow our installation guide to install Windows 7 on a PC through a demonstrative tutorial.


