You are going about your day using the computer but Windows 11 keeps lagging for some reason. Moreover, even cleaning the dust off from the laptop or the CPU cabinet is not helping.
Maybe it’s time to look at the software level since Windows 11 has a ton of native applications and their process runs in the background.
While Windows 11 intelligently optimizes the apps running in the background. It may be not enough. Excess apps running in the background can slow down your PC and can drain the battery heavily.
The good news is that you can disable background apps in Windows 11.
Free up RAM, processor power, and hard disk usage in Windows with the in-built measures.
These do not require installing third-party tools or following a complex tutorial. But it does need a little bit of understanding of which background apps you should disable and which you should not touch.
A few apps running in the background are core windows apps necessary for your PC. Worry not we have explained it all in detail in this article.
How to Disable Background Apps in Windows 11
Disable Background apps through the Settings app
Windows 11 lets you disable apps running in the background through its settings app. Here is how you can do it within a minute.
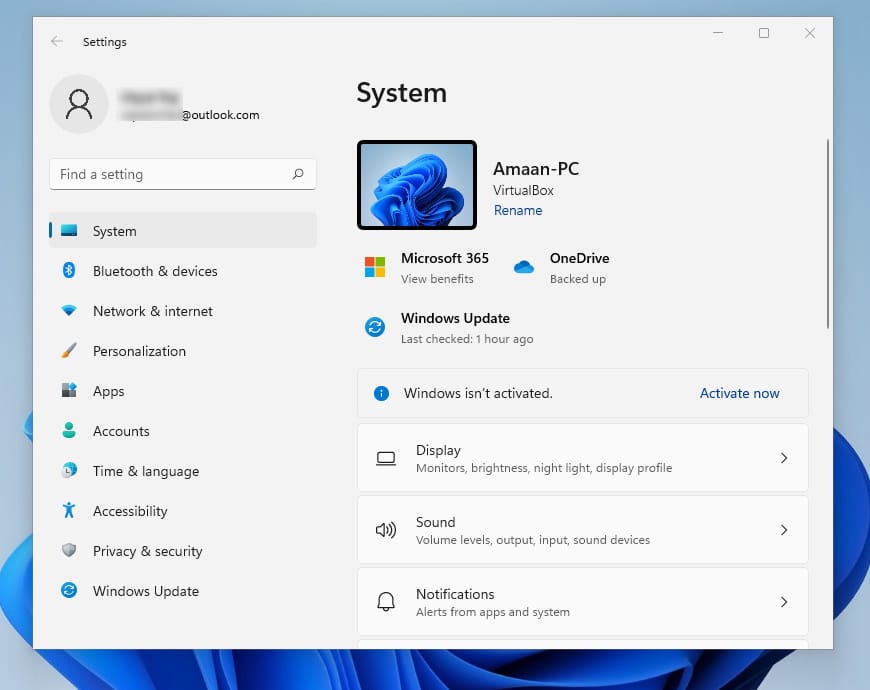
1. Press the Windows key + I on the keyboard and it will open settings.
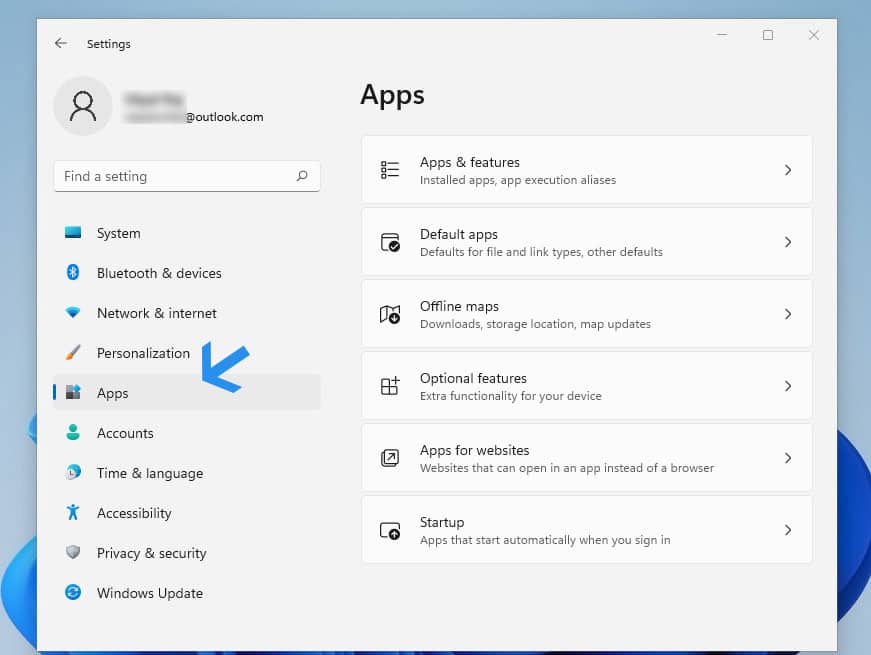
2. Head to the Apps > Apps & features section from the bar on the left.
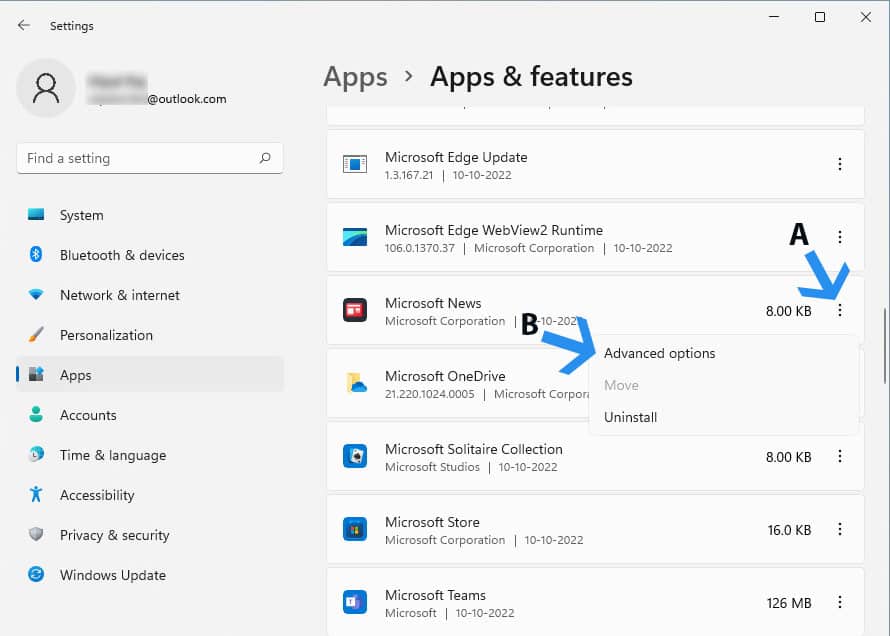
3. Locate the app whose background permission you want to change.
4. Click on the three-dots next to the app name and click Advanced options.
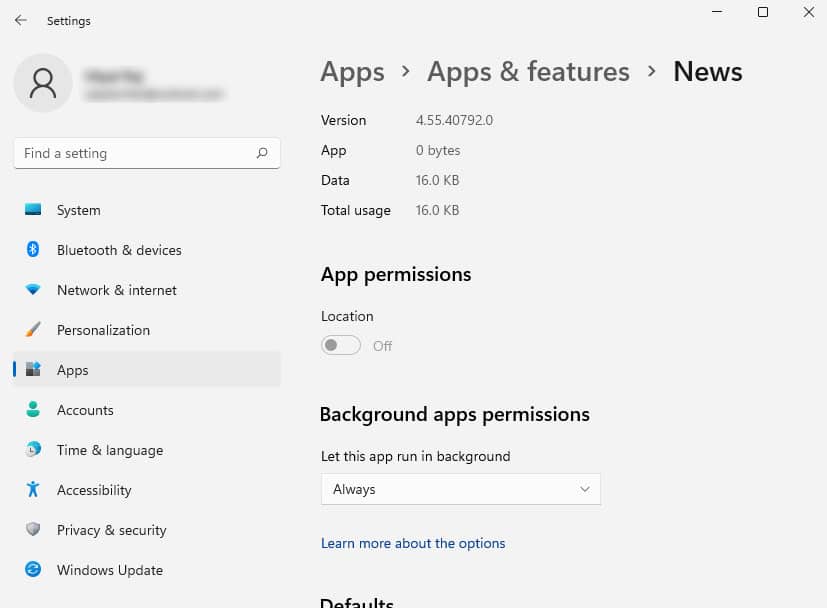
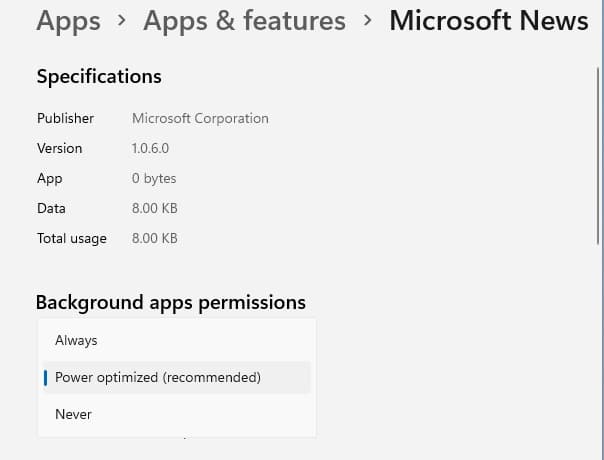
5. Scroll down to the Apps permission and find the Background apps permission.
6. Click to open the drop-down menu of Let this app run in the background and select the Never option. This will disable apps from running in the background without your permission.
Disable Background Apps via Power & Battery Settings
Windows 11 provides you with data on background apps based on the power used by them which comes in handy for laptop users. You can disable the power hogging apps and extend battery life.
1. Press the Windows key + I to open the settings wizard.
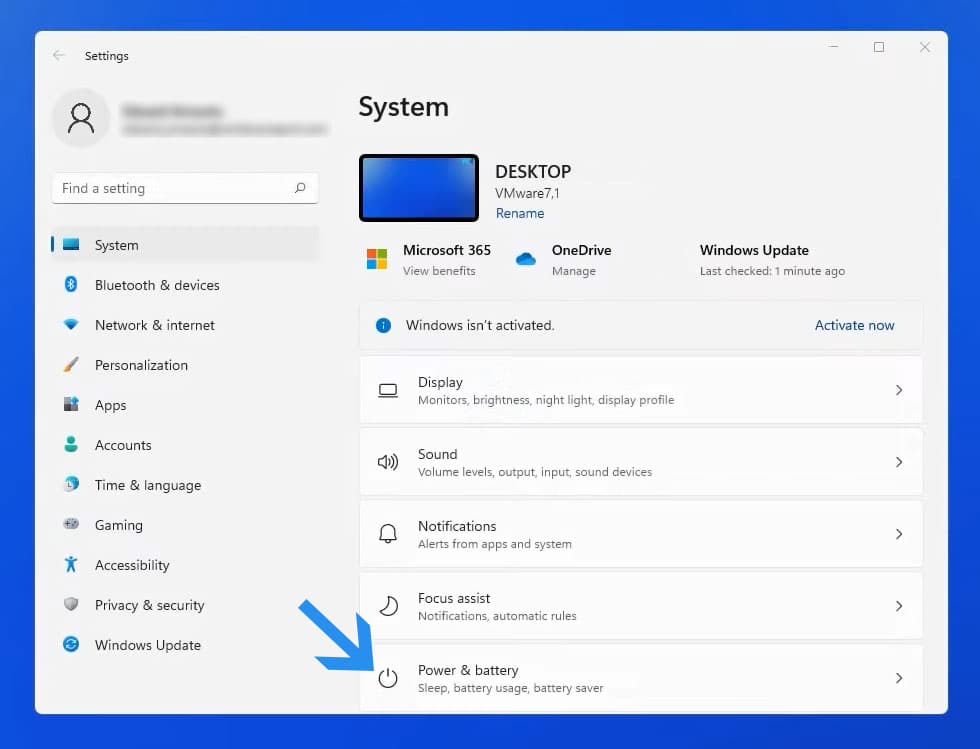
2. In the System tab, scroll down and click on Power & battery.
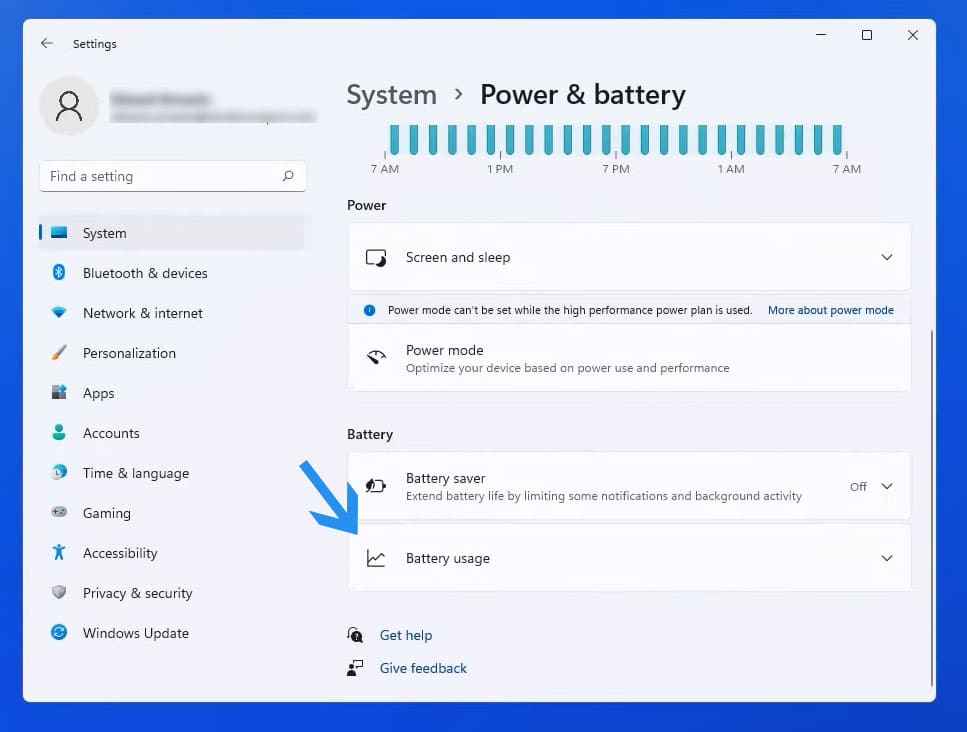
3. Scroll down to the Battery section from the list and click on Battery usage.
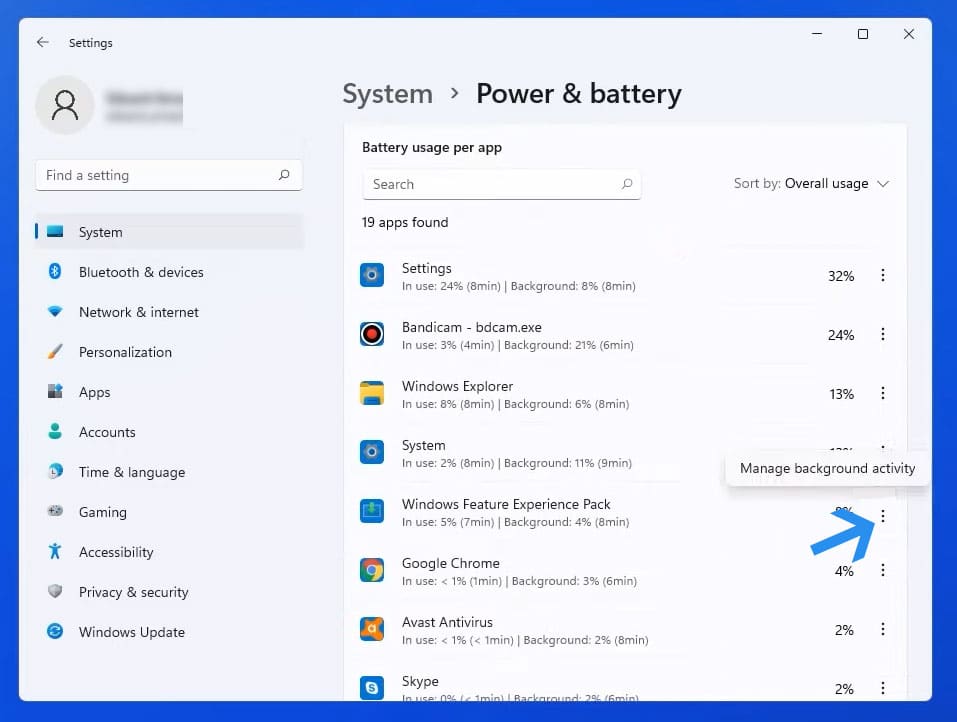
4. Find out the apps which have used the most battery in percentage and then click on the three-dots next to the app name. Go to the Manage background activity menu that pops up.
5. Click on the drop-down menu under Backgrounds apps permission and set it to NEVER.
Doing this will disable the app from running in the background. You can repeat the process for every app that impacts your battery and computer’s performance.
Disable Background Apps through Task Manager
Task Manager lets you see details about the processes and apps running in the background. You can use this information to disable unwanted background apps in Windows 11.
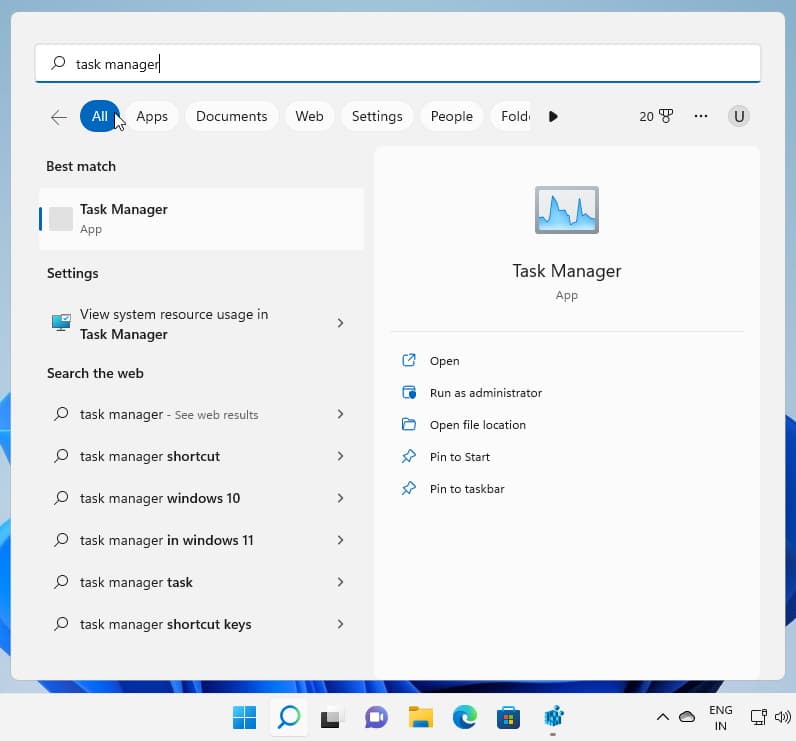
1. Open Task Manager through the Start Menu search. You can press Ctrl + Shift + I to open the Task Manager.
2. Right-click on a particular process in the Process tab which is consuming excessive resources. After that, click on End Task to disable the background app from running.
Disable Background Apps for All Users Using Registry Editor
If you want to disable background apps for all users on the computer, then it can be done through the Registry Editor. We will create a manual registry entry to disable any background app from running on Windows 11 for all user accounts.
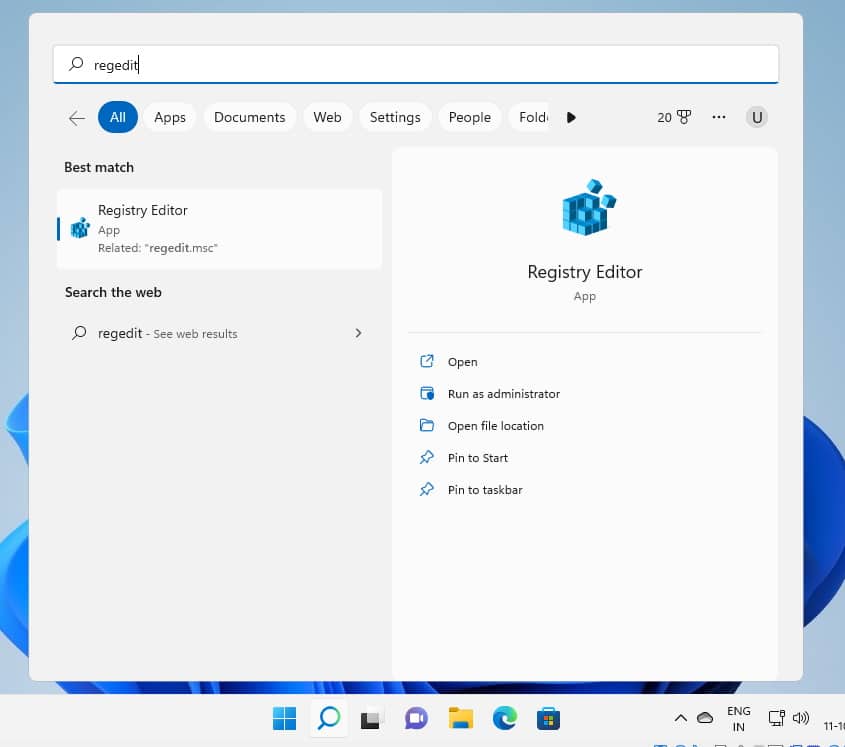
1. Search regedit in the Start menu search and head to the first result by running it as an administrator.
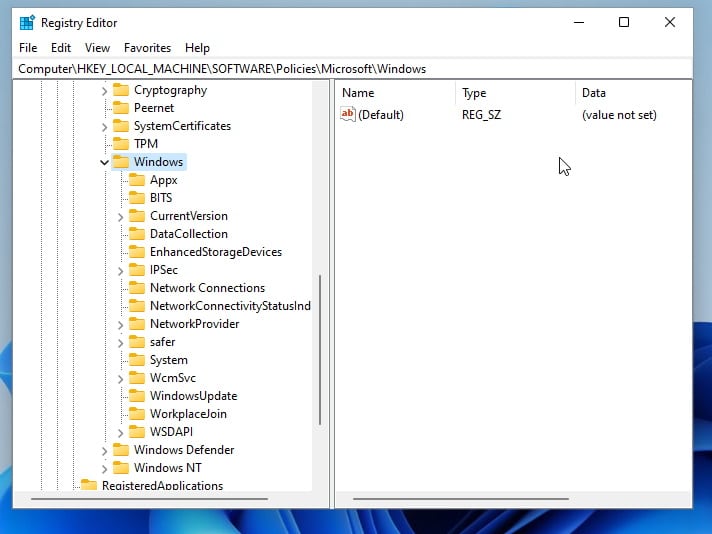
2. Navigate to this address in the Registry Editor through the bar at the top.
HKEY_LOCAL_MACHINE\SOFTWARE\Policies\Microsoft\Windows3. Find AppPrivacy under the Windows key. If it’s not available, then follow steps #4 to
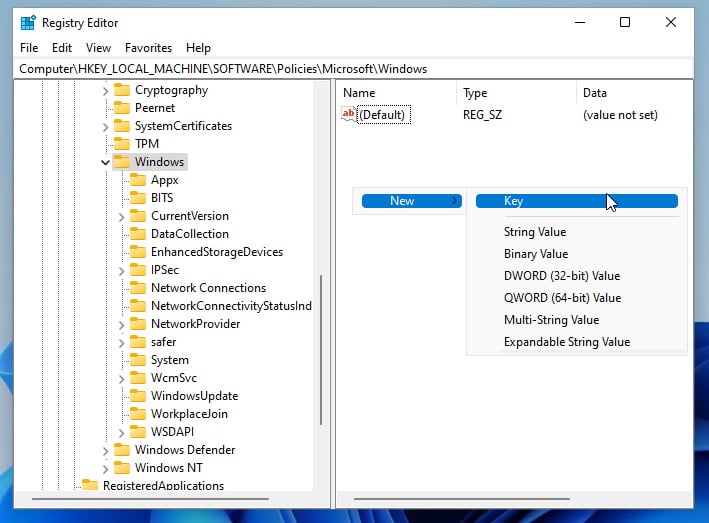
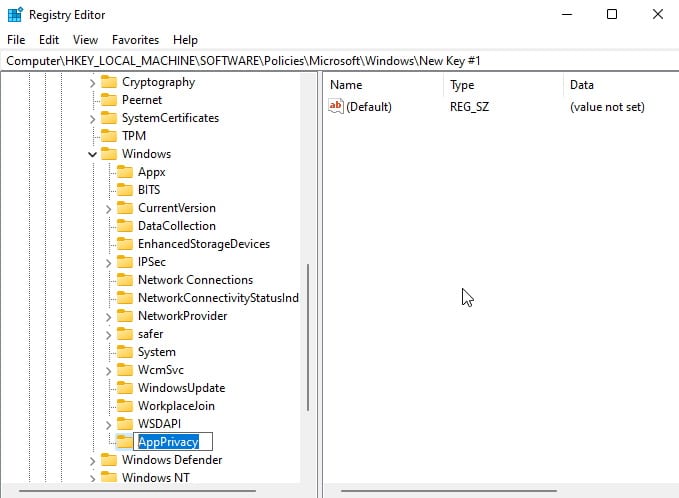
4. Right-click on the right pan and select NEW > Key to create a new key.
5. Rename the key as AppPrivacy from the left pane under the Windows key.
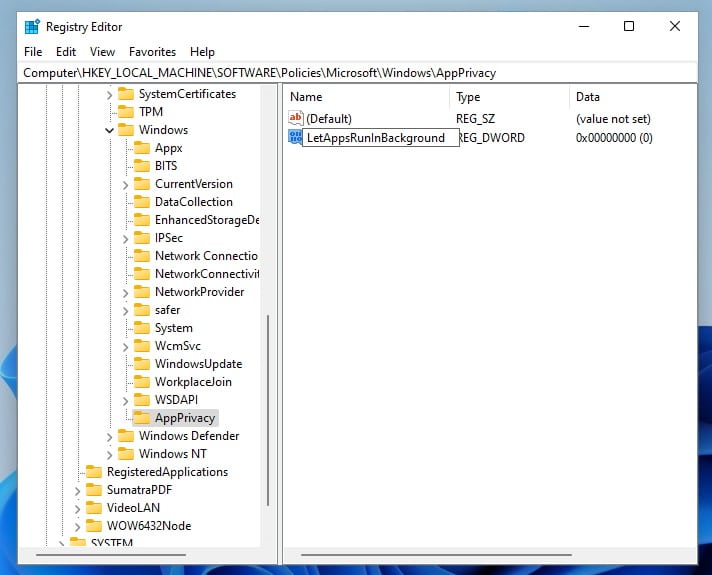
6. Right-click on AppPrivacy and head to New > DWORD (32-bit) Value.
7. Rename the new value as LetAppsRunInBackground.
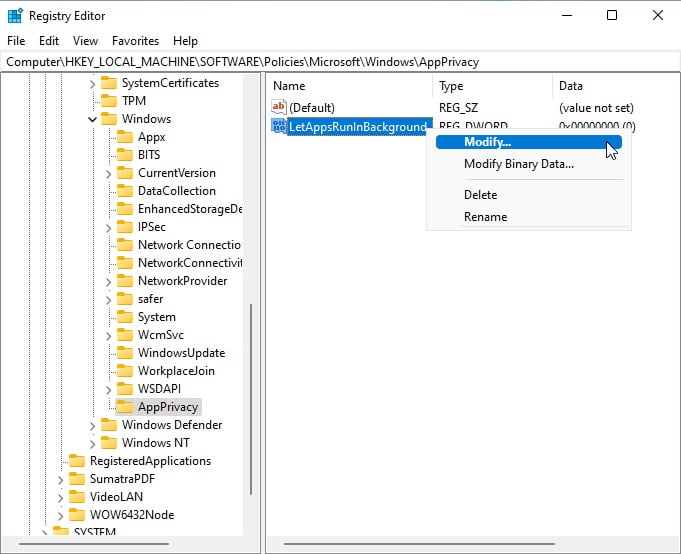
8. Right-click on LetAppsRunInBackground and select Modify.
9. Type 2 in the Value data box and click OK to save the changes.
Close the Registry Editor and restart the computer to apply changes. This will disable Microsoft apps from running in the background in the background on Windows 11.
Disable Background Apps Using the Group Policy Editor
You can also use the Group Policy Editor to stop apps from running in the background in Windows 11. This method is good for administrators who are managing multiple systems.
The Group Policy Editor is only available in Education, Pro, and Enterprise editions. If you are a Home user then download it from here. Run the gpedit-enabler.bat file as an administrator and the Group Policy Editor will be installed on Windows 11.
Here is how to disable background apps using the Group Policy Editor.
1. Open the RUN prompt by pressing the Windows key + R. Type gpedit and press enter to open the Group Policy Editor.
2. In the Group Policy Editor, navigate to:
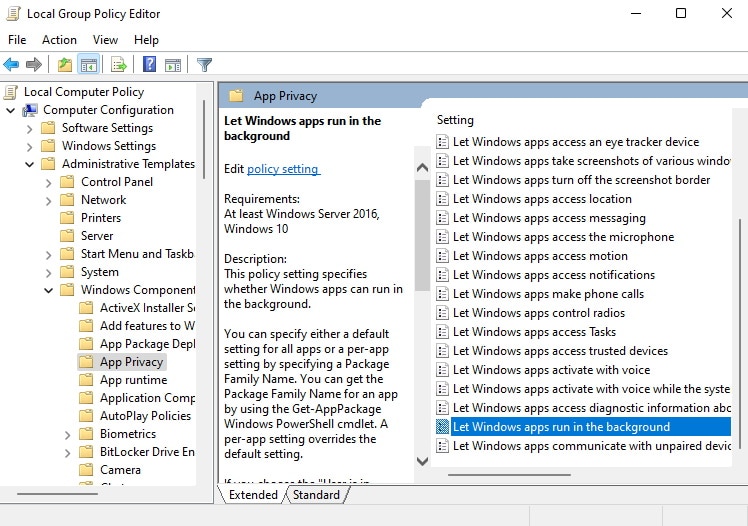
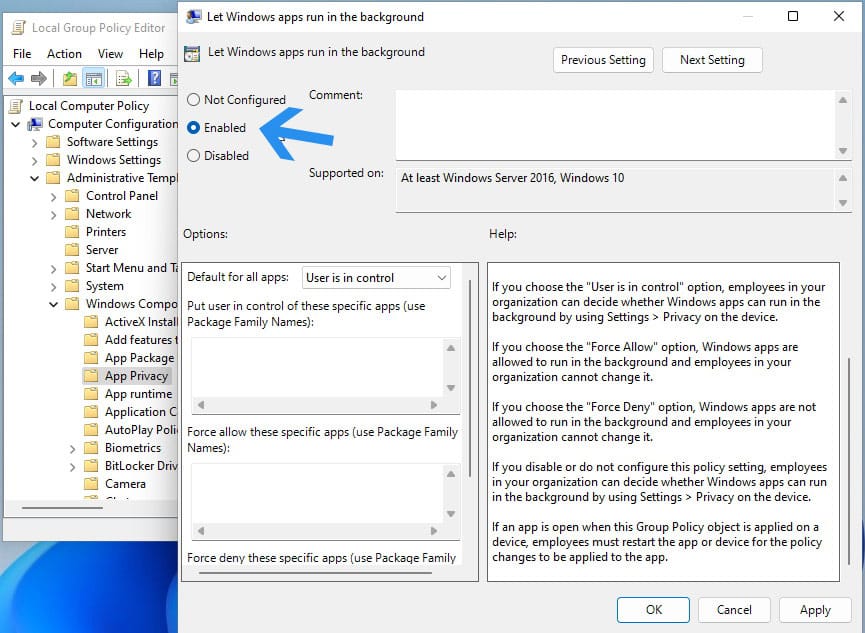
Computer Configuration\Administrative Templates\Windows Components\App Privacy3. In the right pane, find Let Windows apps run in the background policy and double-click to open its properties.
4. Select Enabled from the three options at the top.
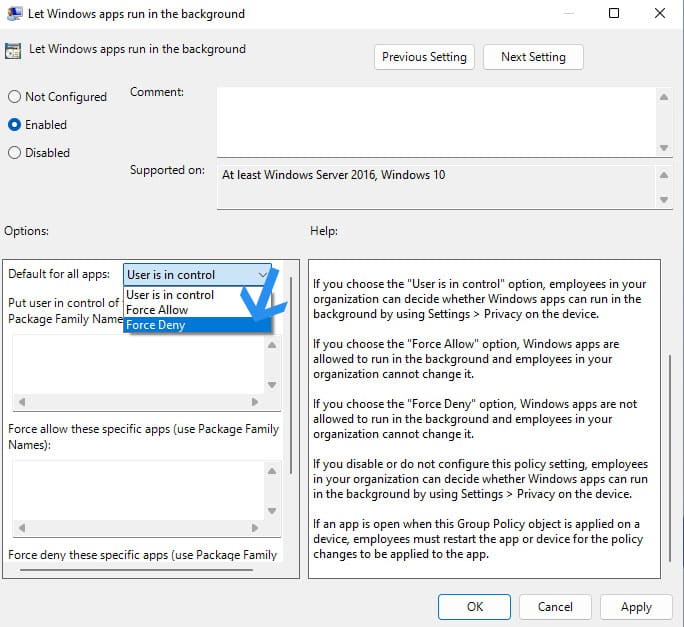
5. Select Force Deny from the drop-down menu in the options section.
6. Click OK to apply and save the changes. This will not allow Windows apps to run in the background.
Disabling Background Apps in Windows 11
Windows lets you configure background app permissions for all the apps installed from the Microsoft store. You can use any of the above methods to disable backgrounds in Windows 11. Restart the computer to apply changes after disabling apps.


